Indoor Plant Investigation - 2
WAVELINKS 200 photonic engine 8 bar Lighting System
Updated -
July 31, 2015 8:22 AM
Purpose is to continue my investigation of the efficiency of growing plants indoors to create a continuous supply of fresh greens and what not for salads. See previous investigation -1 for results, summary, and conclusions on which this investigation is based.
Variables changed from the first are kinds of seeds and plants, the spectrum of light and varying frequencies during the light period to simulate day time frequencies.
Selected light source based on the requirements of low power usage (25 watts), reduced heat resulting in the use of less water, focused wavelengths with light specific for the needs of plants, and being able to control different light frequencies during the illumination period.
For information about the choice of a light source for the investigation check out these sites:
Investigation 1
Summary information on
Plants to grow or not...
Set up
Light and Timer information
Light bars to make an 8 wave mix: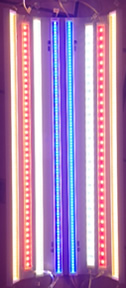
- 2- LK2 Blue 0613
- 2- LK2G2 Red 3914
- 2- LK2G2 6000k 1814 Versa bar
- 2- QCWL 2500k 4113 Versa bar
Placement of bars from the outside of one side to the outside on the other side:
- QCWL 2500k 4113 Versa bar
- LK2G2 Red 3914
- LK2G2 6000k 1814 Versa bar
- LK2 Blue 0613
- LK2 Blue 0613
- LK2G2 6000k 1814 Versa bar
- LK2G2 Red 3914
- QCWL 2500k 4113 Versa bar
Light strips that turn on at 6 AM and off at noon, then turn back on at 4 PM and off at 10 PM.
- QCWL 2500k 4113 Versa bar
- QCWL 2500k 4113 Versa bar
- LK2G2 Red 3914
- LK2G2 Red 3914
Light strips that turn on at 10 AM and off at 6 PM
- LK2 Blue 0613
- LK2 Blue 0613
- LK2G2 6000k 1814 Versa bar
- LK2G2 6000k 1814 Versa bar
Total light is set for 16 hours. Turning on at 6:00 AM and off at 10:00 PM.
They over lap for a full 8 wave mix from 10 AM - noon and 4 PM -6 PM.
The Reds are situated on the far outsides to simulate the horizons, and the blues and 6k are oriented more like high noon and afternoon.
Planting
Seeds and reason for their selection: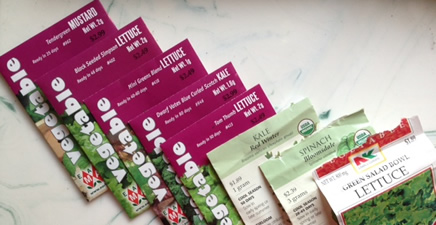
- Bloomsdale spinach: encore performance from first planting because of taste and growth response.
- Red winter kale: encore performance from first planting because of taste and growth response.
- Green salad bowl lettuce: encore performance from first planting because of taste and growth response.
- Blue curled scotch dwarf kale: rich in nutrients and red winter kale taste okay and grew well so trying another variety
- Tom thumb lettuce: like lettuce and don't have room for big plants so going for small and tasty
- Mini greens blend of red and green lettuce varieties: like lettuce and don't have room for big plants so going for small and tasty.
- Black seeded simpson lettuce: like lettuce and this was labeled small
- Tendergreen mustard: grows in 35 days. Looking for fast and tasty.
- Red cherry tomato second planting to check growth response. Package not pictured.
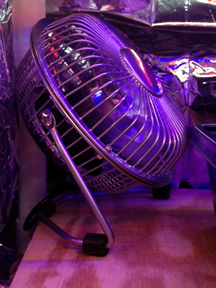
Fan information


Procedure for watering
When the seeds are first planted they are lightly watered from the top. After the first two or three days all watering is done from the bottom. The planting box or boxes sit in a larger water tight container so water is poured into the larger container. The planting box has holes in the bottom of its container so it will absorb the water in about 20 minutes (3-4 cups). Then the moisture level of the soil in the planting box is checked by inserting a finger or stick between the stems of the plants and the outside edge of the box. If the soil is dry below an inch or two, then more water is added to the water tight bottom container. If the soil is moist above an inch or more, then the remaining water is remove from the larger water container.
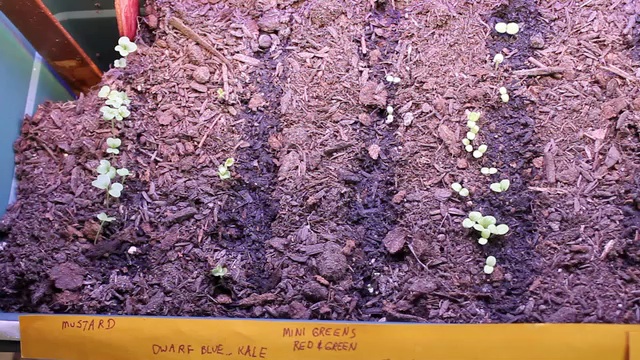
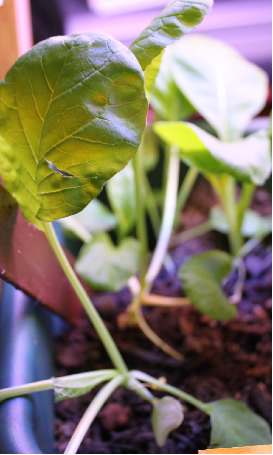
Day five
Start of seedlings:
Click on image for video:
Day ten
Click on image for video:
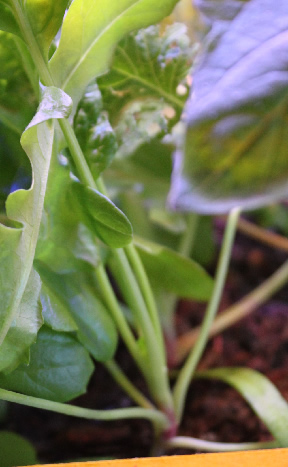
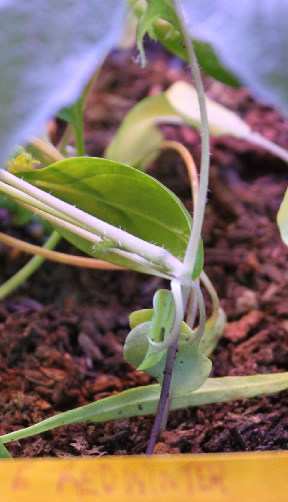
Day fifteen
Click on image for video:
Day 25
Harvest after 25 days: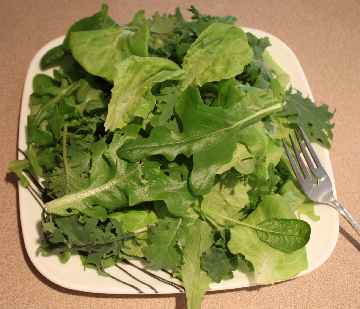
There are three variables that I will use to describe the quality of these greens and the one tomato plant. Distance of the first leaf bundle to the soil level, size of leaves, and height related to foliage density.
Mustard: the bottom leaf bundle was highest of this planting group above the soil level and plant didn't stand up well. Leaves were small and height was tall related to a sparse density of foliage.
Dwarf blue kale: the bottom leaf bundle was high above the soil level, but the plant stood up okay. Leaves were small, but robust and height was moderate related to a moderately dense foliage.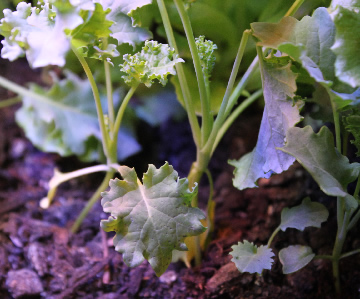
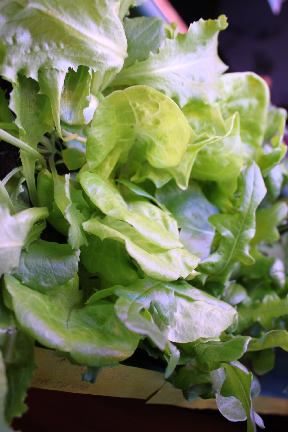
Mini greens: green red: the mini greens are on the left of the picture below. The bottom leaf bundle was close to soil level and the plant stood up okay. Some of the plants that were removed when thinning did not. Leaves were medium, robust and height was fairly thick related to a moderately dense foliage.
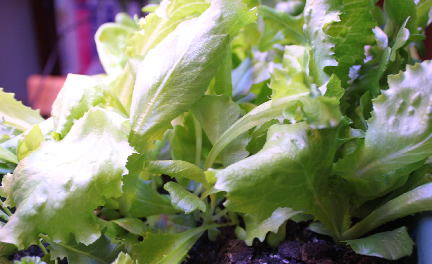
From left to right: Mini greens: green & red, Tom thumb, green salad bowl and spinach: These were the best performers. Bottom leaf bundles were close to the soil level, plants stood up well. Leaves were robust and height thick related to a moderately dense foliage.
For 25 day plants this seems most promising for further investigation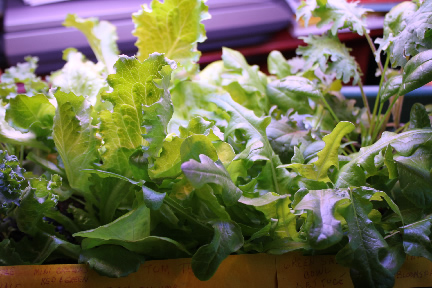
Tom Thumb: the bottom leaf bundle was very close to the soil level, and the plant stood up very well. Leaves were robust and height was moderate related to a very dense foliage.
Dwarf blue kale far left, Tom Thumb mid-left and green salad bowl lettuce mid-right, and spinach far right: These four did very well. I believe they would be good selections for growing indoors in a fairly confined space. These were planted in a pot that was six inches deep with five inches of soil. The width was seven inches and after thinning there were 4 plants in a row with the rows between 2-3 inches apart.
After harvesting: shows how the plant growth was close to the soil level. Would have been interesting to see how a secondary foliage might have produced. 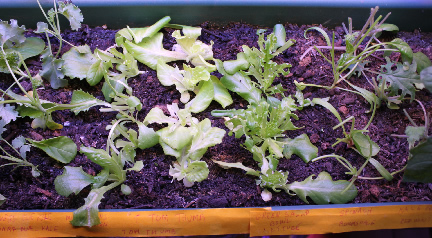
Spinach: The bottom leaf bundle was fairly close to the soil level, the plant stood up okay. Leaves were small, and height was okay with total foliage less than medium dense.
Red winter Kale: the bottom leaf bundle was high above the soil level, however the plant stood up okay. Leaves were small and height was tall related to a sparse density of foliage.
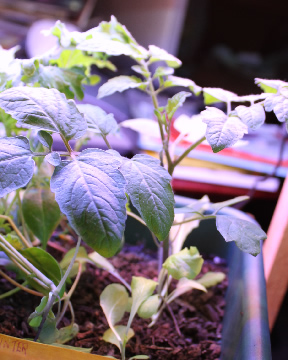
Tomato with black seed simpson below. Tomato was potted in a larger container and future progress for it will be reported in Investigation 1. Black seed simpson started okay, but fell off even before the tomato plant took off.
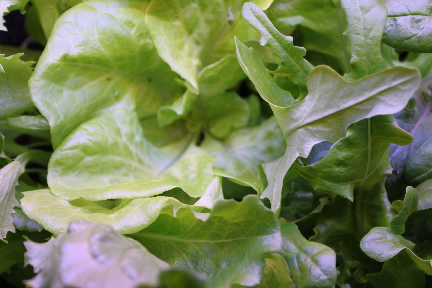
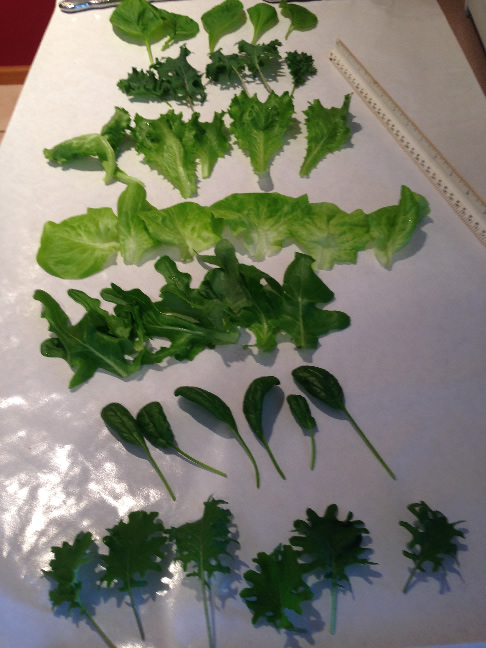
I selected six leaves, from each plant that what was harvested, that I think shows the range of size and quality of foliage. In order from top to bottom: mustard greens, dwarf blue kale, Mini greens: green & red, Tom thumb, green salad bowl lettuce, spinach, kale red winter.
Conclusions
The dwarf blue kale, Tom Thumb, and green salad bowl did very well. The Bloomsdale spinach and red winter kale were right behind. While the mustard plant stems were spindly the leaves were okay as baby greens. I would suggest to continue to try different varieties of spinach and mustard greens to grow in these conditions.
However, I believe the dwarf blue kale, Tom Thumb lettuce, and green salad bowl lettuce, are excellent candidates for growing greens, in an indoor environment, that produces results a quality plant and a quality finished product that is larger than micro-greens and comparable to greens packaged as spring varieties. I feel confident it should be fairly easy to replicate similar results. Growing these varieties indoors in a planter with a soil depth of five inches and plants spaced 2-3 inches apart using the Quantum Wavelinks 200 eight wave mix lighting system to produce quality plants ready to harvest in about 25 days.